Wednesday, February 20, 2013

Altered cd - Tutorial (Flourish With A Bling)


Hi everyone! Well, it is my turn to do a tutorial over at Flourish With A Bling and so I decided to try my hand at altering a cd and this one is for my dear Mother. So without further ado let's take it step by step.
Materials required:

QuicKutz Cutting Dies Nesting Doily Circles (L-CC-001)
Some scrap pieces of patterned paper
White cardstock
2 x compact discs
Walnut stain dsitress ink or brown chalk
Five little tassles
Lace
Ribbon
Sandpaper
Modge Podge
Paint Brush
Thin nail
Pliers

Step 1.


Place both compact discs on to your patterned paper and trace a circle around both.
Cut out the circles and ink the edges. Put these circles aside.
Use the sandpaper and roughly sand both sides of both discs. Be careful not to inhale the dusty residue.
Wipe the discs clean and get rid of any dusty residue.
Step 2.


Use a paintbrush and apply an even layer of  Modge Podge to both the one side of the disc and the back of your patterned paper.
Adhere the circle to the disc and use a brayer to even it out nicely. Do not worry about the centre circle of the cd showing because you are going to cover it up with subsequent layers op paper. If I was smart enough I would have used the other side of the disc which doesn't have the protruding centre piece..lol!! Note to self for next time!!
Repeat this step on the second disc.
Step 3.


Take one of the compact discs and make five little marks approx 1cm apart at the bottom of your cd with a pencil. (Follow the curve of the circle)
Step 4. 

Place your cd on a piece of wood or something, take the nail, hold it with a pair of pliers, and heat the nail over an open flame. 
Step 5.

As soon as the nail is red-hot, place it on the first hole and press down firmly. The heated nail will burn a neat little hole through the paper and the cd.
Make four more little holes in the same manner. I’m tempted to say “Do not try this at home!” If the nail did not go right through the cd, just heat it up again and repeat the process.
See, five neat little holes! Sometimes the edges of the holes are a bit rough due to the melted plastic of the cd but I just use a wire cutter and clip the rough edges off neatly and then sand them very lightly.
Step 6.

Now thread your tassles through the holes from front to back
Step 7.


Use the largest and second largest of the nesting dies and cut one doily of each size from your plain white cardstock using your Cuttlebug. Plate A, Plate C, Nesting die facing cutting edge up, cardstock, Plate B.

Step 8.

Apply Modge Podge to the back of the cd and adhere your largest doily to the cd making sure your frilly pattern is nice and even around the outside of the circle.

Apply Modge Podge to the back of the smaller white doily and adhere to the centre of the front of the cd. Avoid Modge Podge on the frilly part of the doily
Step 9.

Gather your strip of lace and adhere to the back of the cd.
Step 10.

Using another piece of patterned paper, draw a circle 9.5cm in diameter and cut it out and ink the edges and distress lightly. You can also do some faux-stitching around the edges of the circle.


You can now use a rub-on for the sentiment or you could print a sentiment on your paper before you cut it out. Adhere this circle to the centre of the doily.
Step 11.

Now adhere the second cd to the back of your project by applying some Modge-Podge to the shiny side of the cd and adhere to the back making sure it is centred properly. This holds your lace firmly in place and gives a lovely, neat finished look to the back of the project.
Step 12.

Burn another hole at the top of the cd using the same method previously described except this time use a thicker nail which will burn a hole through all your paper layers and both cds. You will want to make this hole slightly larger so you can thread some ribbon or binding through the hole which will then be used to hang your project against the wall.
Step 13.
Embellish to your heart's content and use lots of lovely FWAB bling!! I used some gorgeous FWAB Adhesive Pearls 100 Pack Copper and I attached them with some Glossy Accents.
                                                  FWAB Adhesive Pearls 100 Pack Copper

This also reminds me that I need to share some fabulous news with you. Flourish With A Bling has gone retail!!! Have a look at this fabulous offer below:

Hello everyone!  The team at FWAB have some fantastic news to share with all of you – our lovely customers!!!

FLOURISH WITH A BLING has gone retail!!!


That’s right – now you can buy all the bling you want in the one place!  How cool is that!!!

So, to celebrate this new venture, we at FWAB have put together FANTASTIC value packs in great themes to entice crafters as well as offering them at discounted prices!!! 

Here’s a sample of what’s on offer…


Contents: FWAB kates corner – black & silver; FWAB chloe flourish – pearl & black; FWAB grace flourish – pearl & black; FWAB jasmine puffy flourish – white & black; FWAB jessie flourish – black; FWAB luke flourish – black; FWAB adhesive 100 pearl packs – black & pearl; FWAB rhinestones 100 pack – silver; FWAB flowers silver x 3


Contents: FWAB bella flourish set – wine; FWAB elise flourish & flower set – black & silver; FWAB kates corner flourish – silver; FWAB chloe flourish – purple, pink & pearl; FWAB grace flourish – red, teal & plum; FWAB adhesive 100 pearl packs – olive green; FWAB rhinestones 100 pack – silver


Contents: FWAB trents fence; FWAB lees tree; FWAB chloe flourish – blue & baby blue; FWAB jessie flourish – black; FWAB luke flourish – chocolate, silver & denim blue; FWAB adhesive 100 pearl packs – copper, chocolate & blue; FWAB jack – black; FWAB grace – chocolate


Contents: FWAB adam vine; FWAB taylah’s toadstools; FWAB lees tree; FWAB jack vine – green & olive green; FWAB chloe flourish – red & olive green; FWAB jessie flourish – red; FWAB adhesive 100 pearl packs – red & antique gold; FWAB rhinestones 100 pack – silver


Contents: FWAB nicky’s beach huts; FWAB taylah’s toadstools; FWAB up in the sky; FWAB trents fence; FWAB lees tree; FWAB jack vine – green & olive green; FWAB luke – chocolate; FWAB jasmine puffy – orange; FWAB adhesive 100 pearl packs – mango;  FWAB chloe flourish – olive green & blue


Contents: FWAB nicky’s beach huts; FWAB taylah’s toadstools; FWAB up in the sky; FWAB trent’s fence; FWAB lees tree; FWAB jack vine – green


Contents: FWAB kate’s corner – silver; FWAB chloe flourish – pink & purple; FWAB jasmine puffy flourish – lilac & hot pink; FWAB jasmine laser flourish – pale pink; FWAB grace flourish – pearl & pink; FWAB adhesive 100 pearl packs – purple, pink & pearl; FWAB rhinestones 100 pack – silver; FWAB pink flowers x 3


Contents: FWAB adhesive 100 pearl packs – rose pink, olive green, purple, antique gold, blue, teal, pink, mango, copper, plum, chocolate, red, pewter, latte, black & pearl


Contents: FWAB adam vine; FWAB luke flourish – chocolate; FWAB kates corner – black; FWAB chloe flourish – antique gold; FWAB jack vine – olive green & black; FWAB grace flourish – pewter & latte; FWAB elise flourish & flower set – antique brown; FWAB adhesive 100 pearl packs – antique gold & pewter; FWAB flowers – 2 x chocolate, 1 x latte blossom; FWAB adhesive rhinestones 100 pack – antique brown


Wow, hey?!  These packs represent outstanding value for money!But wait – there is more!

FWAB is offering a free JASMINE laser flourish with the first 50 FWAB value pack orders!  The only thing you have to do is write in the comments section of your order how did you find out about FWAB  going retail. 

Be sure to check out all the awesome FWAB goodies in store right here!!!

Flourish with a Bling… Putting the Bling into Scrapbooking! :) 

Isn't this just awesome??? Well, on that note I am going to love and leave you for now. I hope you like my tutorial and if there is anything that is not clear enough, please don't hesitate to contact me using my facebook or e-mail address which you will find at the top of my blog!! Bye for now!!xxx


Tuesday, February 19, 2013

Through Eyes Of Love


Hi there everyone:) Finally I got to finish my layout for the challenge at Once Upon A Sketch. It feels like I've been working on it for a whole month but the truth is that I have had the busiest six weeks of my life. So much to do and so little time and foumd myself scrapping through the night to get everything done. No time for scrapping during the day lately. Anyways, this is my take on Nadia's beautiful sketch, and this month the theme is all about LOVE. Now, for those of you who know me well enough, you will know that I totally connect that little four-letter word with my dogs, who are my life and my loves and who gives me so much more than I could ever wish to give. There are so many things I love, in fact I love everything on Nadia's little list but my canine children is always at the top of that list and always seem to be my priority, no matter what, much to my hubby's chagrin at times...lol! Well, this is Delta, one of my many shadows. She is now 3 years old and she never takes her eyes off me...hence the title of my page. Often I look at her and I wonder what she's thinking when she stares at me like she does, but it doesn't really matter because all I see is "LOVE" and that is all that counts. :) Oh dear, I could just go on and on about my dogs but best I show you the beautiful sketch before I forget.:)

This is also a project for Flourish With A Bling and I used the very pretty FWAB Bella Rhinestone Flourish Black.
 and also my favorite colour FWAB Adhesive Pearls 100 Pack Pewter.
Oops...can you see one of Miss Molly's little hairs on here?? LOL!! That's all for today folks...look after yourself and take care till next time!xx

Thursday, January 31, 2013

12 Tags of 2013 - (January) Tim Holtz

This is my take on Tim Holtz' 12 Tags of 2013. I've always wanted to do these but there was always something else to be done and this year I am making a point of doing one every month. Soooo, when sleep totally evaded me last night, I decided that instead of staring at the ceiling from a different angle every five minutes, I'll make a tag. Of course, by the time I was finished with it, my mind was so stimulated and there was actually no point in going back to bed. No need to tell you that I've had a caffeine overload today but at least I spent the time in a productive way which is what this tag is all about....make every minute count!!

Till next time...take care!xx

Friday, January 18, 2013

The Start Of Something New


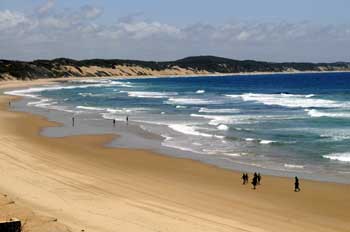
Hello friends :) Hope everyone had a fantastic Christmas Season and before I say anything else, I'm taking this opportunity to wish all my friends a wonderful 2013!! On that note, the theme over at Once Upon A Sketch for the January challenge is "The Start Of Something New" and once again Nadia provided a beautiful sketch to work with. I was in Mozambique in December and on NewYears Eve we were playing around on the beach and it was quite fascinating to see the tide wash away the silly things we were writing in the sand and then an idea started forming in my head to take a photograph of the tide washing away my 2012 inscription in the sand and for some reason, once I wrote 2013, the water just did not want to reach it so it was quite symbolical for me...the start of something new :) The journaling reads: "A fresh start, a new beginning, so many possibilities!! Hoping that this new year will bring everyone more joy, more music, more laughter, more gratitude, more friends, more surprises and lots of happy memories!!

The vine is a home-made job-a-la-Cathy and I used some pretty little pearls from Flourish With A Bling.

And here is Nadia's beautiful sketch:)


That's all for now, take care till next time :)

Monday, January 14, 2013

Double Tri-fold Cascade Cards

These are just a few cards I made for some very special friends who unknowingly touched me very deeply with their simple acts of kindness and thoughtfulness. I'm not really a "card" person but I had a lot of fun making these and the best part of thse cards are that you can insert little token gifts and/or tags within the folds and it becomes kind of a wrapped gift as well..lol!


Sunday, December 23, 2012

Snow Not Fun


Hi there my friends :) Ok, so I had time for just ONE more layout before this year runs out on me. This is my entry for case #50 over at CSI and here is the case file.
THE SCHEME (USE ALL 5 COLORS)
Menorah - medium cocoa brown, taken from the menorah
Taupe Tradition - light taupe, taken from the placemats - 237.229.218
Light the Candles - white, taken from the windows - 255.255.255
Blue Dreidel -light grayish blue, taken from the highlights of the ribbon - 193.205.219
Eighth Night - dark grayish blue, taken from the darkest part of the ribbon - 99.117.129
EVIDENCE (USE AT LEAST 2 ELEMENTS)
  • ribbon
  • wood
  • fabric
  • something that melts, like wax or embossing powder
  • stitching
  • stripes
  • something transparent or made of glass
  • string (inspired by wicks)
  • something metal
  • something shimmery/shiny
Here I used six elements . I used ribbon to make the little blue rose, I also tied ribbon to the tags as well as a strip of ribbon above the title. I used a wooden button and stuck a raffia bow onto it. The bird house is also a wood chippie which I painted. I stitched around the border of the page. I used stripes on the "fun" banner. I used bits of string on the tags and the pearls represents something shimmery.shiny.
 TESTIMONY (USE AT LEAST 1 ELEMENT)
  • Document a holiday tradition.
  • List 8 important things about your topic.
  • Tie a ribbon around your journaling.
  • Use these Hanukkah writing prompts, or adapt them to meet your own traditions.
  • Use stripes in patterned paper to use for your journaling.
  • Inspiration Words: tradition, miracle, light--use these as inspiration for your journaling, not just as a title about your topic.
Here I opted to list 8 important things about my topic which is written on a tag and tucked behind the photo.
Dring the month of August 2012 South Africa experienced widespread snowfall across the country. It snowed in places that has never seen snow before and for us South Africans it is a major event and school children and office workers took to the playgrounds and streets to witness the heaviest snowfalls since 1981. I live on the coast and therefor we never ever see snow but people drove hundreds of miles to witness the snow and one weekend we decided to take a trip up to the Midlands to go and see the snow and I really thought that Miss Molly in particular would enjoy it very much as she has such a dense coat and therefor she's always hot. At home she loves the airconditioning and is always lying flat on her tummy on the cool tiles. Well, I was so wrong!! She hated it. When I got out of the car she was not going to stay behind but she quickly regretted it and looked positively miserable after five minutes of being out in the snow. Now, if I know my baby as well as I think I do, then I can only guess that these are the reasons she didn't like it and that this is what was going through her mind.
1. It doesn't taste like chicken
2. It burns my delicate pink butt when she sits down.
3. I don't like to blend in with my surroundings...being the princess in the house I like to "stand out".
4. It makes my feet wet..I hate it when my feet are wet.
5. My legs are too short to jump over the drifts.
6. Sometimes the snow is higher than me and I can't see my mom.
7. Slipping and sliding is a very undignified way of getting around.
8. My fluffy tail which is my pride and joy hangs behind me like a wet rag.

Thank you Debbi and the CSI team for the inspiration and another awesome case file :)


Sunday, December 16, 2012

Time Out

Hello friends:) I have a feeling that this may be my last post for 2012 as I still have tons to do before we leave for a ten day break in Mozambique. I am sooo looking forward to it. I would like to take this opportunity of wishing everyone a Merry Christmas and a fabulous 2013. Thank you for all your support during 2012 and more so, thank you to each and every one of you for your friendship.xxx

This is my take on various challenges..had to make the best of the time that is available to me :)The layout is my entry for yet another fabulous sketch challenge over at Once Upon A Sketch and here is Nadia's beautiful sketch. My journaling is at the back of the tag. Thank you OUAS for another awesome challenge!

Then I have also entered this layout for the challenge over at CSI Case File Number 49.Once again Debbi put together a fabulous case file. Here is what we had to work with. Love it!
THE SCHEME (USE ALL 5 COLORS)
  • Garland Green - medium green, taken from the #5 tree - 135.154.47
  • Pink Presents - deep pink, taken from the #10 mittens - 222.108.118
  • Yuletide Yellow - light buttery yellow, taken from the #21 box - 248.230.164
  • Advent Aqua - aqua, taken from the #15 box - 93.198.201
  • Lime Lights - lime green, taken from the ribbon in #23 - 185.217.108
Here I used the medium green in the flowers, a tiny bit of pink on the clock, light buttery yellow on the leaves, blue on the flowers and the lime green is pretty much eerywehere..lol!

EVIDENCE (USE AT LEAST 2 ELEMENTS)
  • numbers
  • stickers
  • punches
  • rhinestones
  • buttons
  • baker's Twine
  • ribbon
  • lace
  • make a semi-circle notch, like in the little boxes
  • snowflakes
  • Christmas/winter accents
  • hound's-tooth pattern
Here I used "numbers" for the date, a punched border strip, rhinestones in two of the flowers and lots of buttons in the flowers and on the right hand side at the bottom.

TESTIMONY (USE AT LEAST 1 ELEMENT)
  • Document a holiday tradition.
  • Document what you do to prepare for the holidays.
  • Number your journaling.
  • Write 25 words or phrases about your topic.
  • Choose a prompt from here.
  • Put your journaling inside of something that can be opened
  • Inspiration Words: joy, believe, count --use these as inspiration for your journaling, not just as a title
 Here I opted to write 25 words and used it in my journaling...just to encourage myself to do do more journaling :) Thank you Debbi for an awesome case!! :)

Then I am also entering this layout for challenge 12 over at Scrap Africa and the challenge is the "film strip".

Last but not least I used the gorgeous FWAB Elise Flourish Black - Dark Green and Silver Grey Flowers available from Flourish With A Bling.

And now I would love to show you where I am going for a few days...Zavora Lodge!! It is a a diver and fisherman's paradise and I guess the "fishing" part is what attracted my daughter to Zavora :)
Well, that's it for today!! Off to go and bath the dogs!! Thanks for looking and have a fabulous holiday and to those who will be on the roads, have a safe trip and take care!xxx


Friday, December 7, 2012

Merry Christmas

This layout is for Sharryn Thompson's December challenge over at Flourish With A Bling. The challenge is to create a layout using non-traditional Christmas colours and of course Flourish With A Bling products. I went with blue, white and silver and I used FWAB's Jasmine Laser Flourish Pearl. Because I had no photos to go with non-traditional Christmas colours, I had to call on Miss Molly yet again (not the first time she had to come to my rescue..lol!!). Bless her little heart for being such a sweet, obliging subject.

Remember This - CSI: Case File No:48


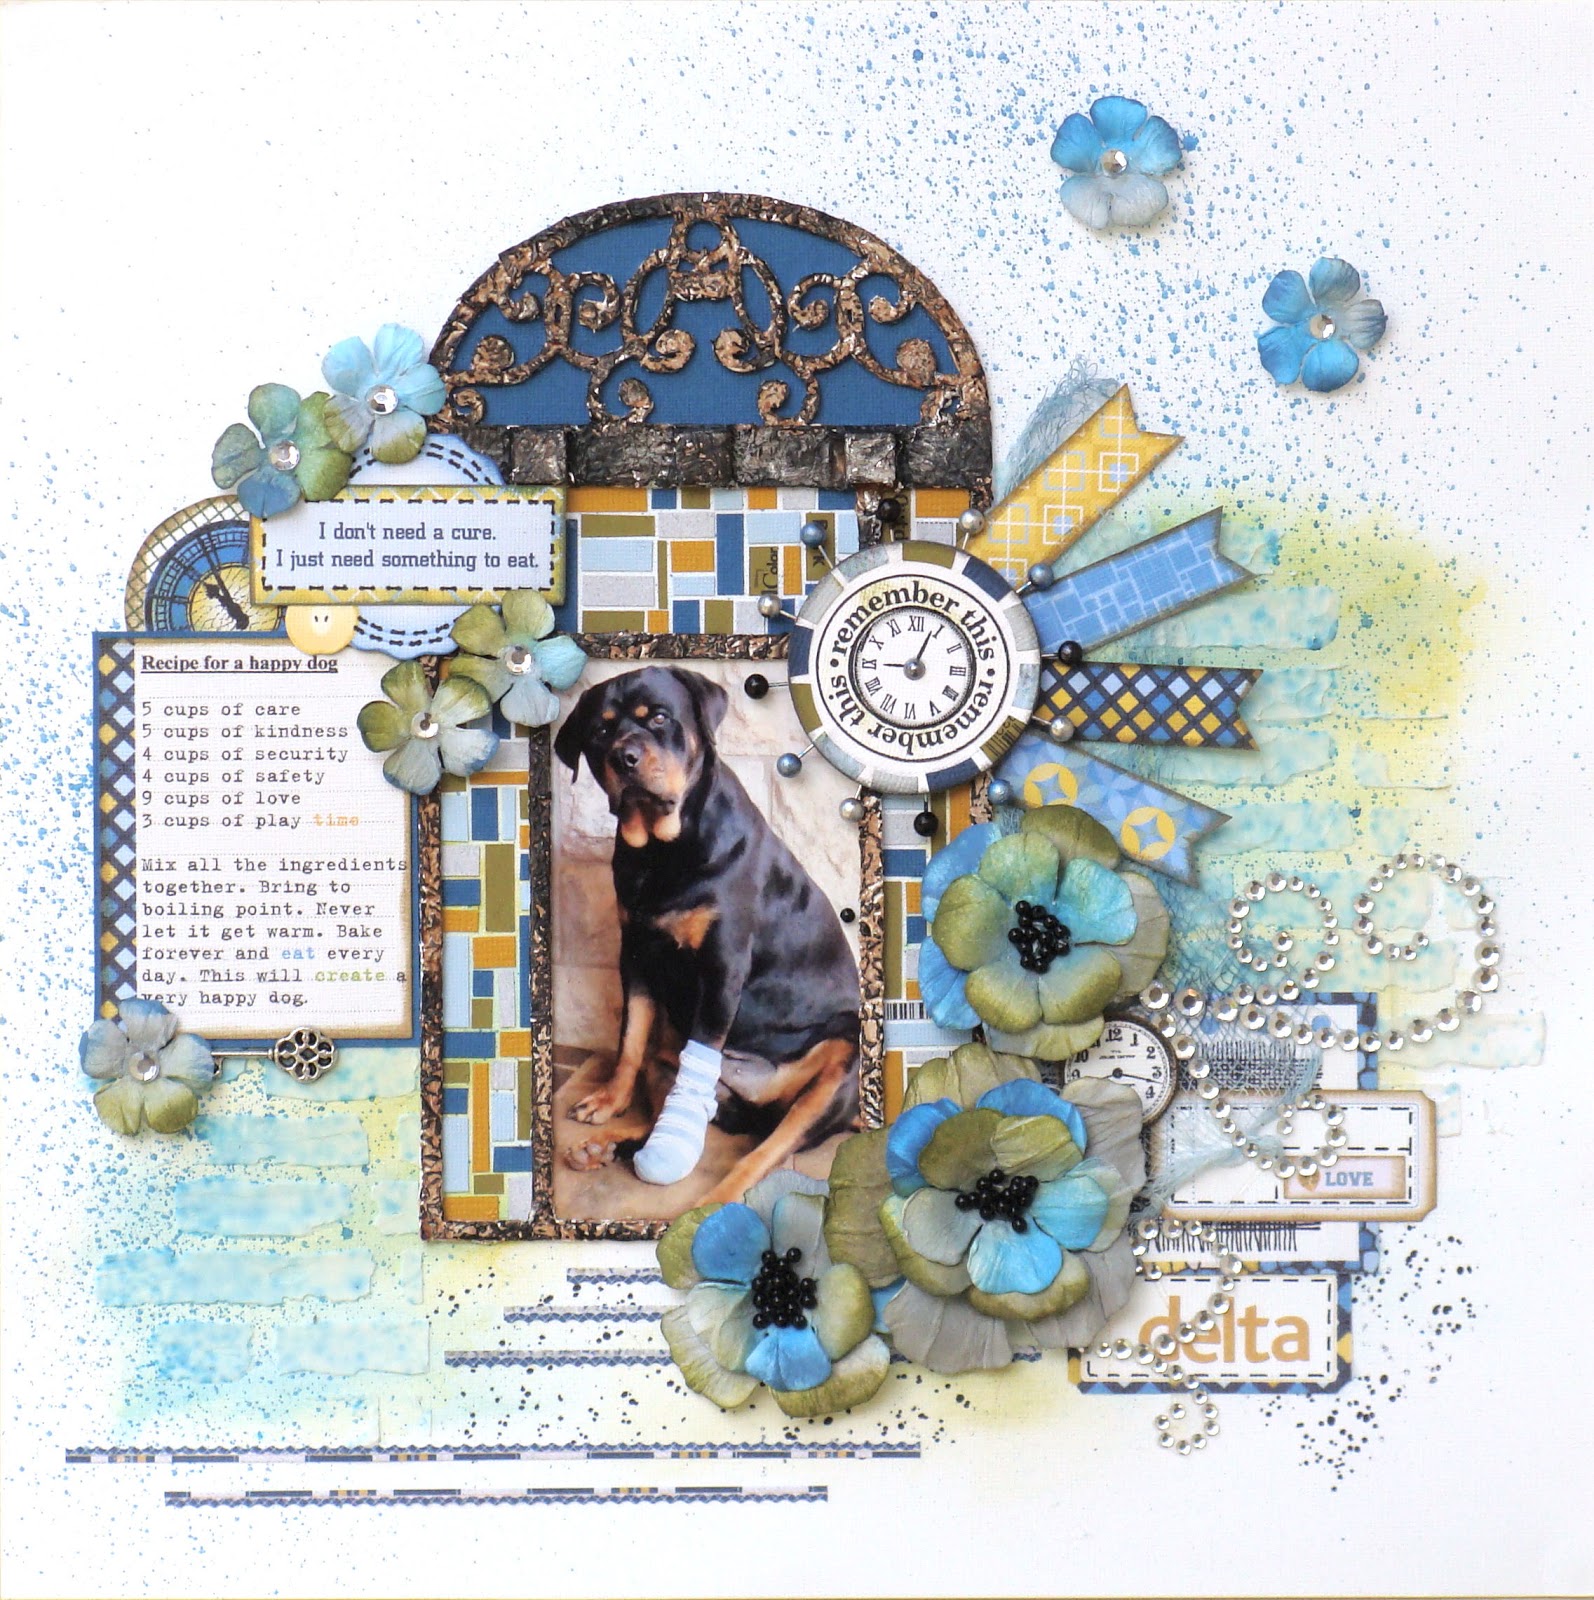
Hello my friends:) I don't know when last I had so much fun creating!! It is the first time I take on a challenge by CSI Color Stories Inspiration and I can kick myself for not having done it before. What a fabulous way to get out of the rut that I was in and the best part of this challenge is that I got to work with colours I would never have imagined could look so pretty together.:) I have to admit that I got very bored with pinks and blues and browns together. This really opened my eyes to a whole new world of colour combinations:) Now here's another thing...I love the Crime and Investigating Channel on TV and I always have it on while I'm scrapping and not because I enjoy the crimes committed, definitely NOT, but because I love the "solving of the crime" part. I love the investigation and I love forensics and the best part is when the criminal is brought to justice!! Ok, now I'm rambling but now you understand why I loved this challenge so much. I had to figure out how to put all these clues together to arrive at the outcome and this is how I did it. First of all, here is the case file:

And here are the detailed clues...ooohh..so much fun! For the "scheme" we had to use all 5 colours as follows and hopefully I have achieved that :)
 

  • Glossy Blue - sky blue, taken from the light blue tiles -- 159.205.228
  • White Tile - white, taken from the counter -- 254.253.249
  • Chartreuse Shine - chartreuse, taken from the green tiles--196.183.43
  • Blueberry - dark blue, taken from the darker blue tiles -- 44.119.150
  • Stainless Steel - gray, taken from the lighter parts of the stove -- 216.207.200
EVIDENCE (USE AT LEAST 2 ELEMENTS)
  • clock
  • mosaic
  • silver metallic elements
  • something transparent
  • glossy accents
  • fruit accents
  • plain brads (inspired by the clock)
  • something inspired by the bowl on the middle shelf on the right (e.g., a border punch, die-cut, lace cardstock)
Here I decided to go for the clocks of which I have three. The big clock was very much inspired by the picture of the clock in the image and so I coloured some pins with metallic markers and stuck them into the circle. I also went for the mosaics by painstakingly cutting little pieces if paper and arranging them in a mosaic type of style ..won't do that in a hurry again..lol! I also have one silver metallic elements and that being the key. The die-cut was inspired by the bowl on the middle shelf on the right. Mmm...I think I have the evidence covered... :)

TESTIMONY (USE AT LEAST 1 ELEMENT)
  • Document something kitchen-related...food, special meals, your cooking talents, your own kitchen.
  • Write your journaling as a recipe.
  • Write your journaling as a schedule (inspired by the clock)
  • Write your journaling in bullets and use glossy brads as the bullets
  • List a bunch of words to describe the topic of your page OR choose one word and use a thesaurus to generate a list of synonyms (don't ask how, but that idea was inspired by the tiles.
  • Inspiration Words: eat, time, create-- use these as inspiration for your journaling, not just as a title
Here I definitley didn't want to document anything in as far as my cooking talents are concerned as that is pretty much non-existent. I have to be the only person who has ever burned a boiled egg, so I opted for doing my journaling as a recipe. In my recipe I also used the "inspiration words" being "create, "eat" and "time" which  did using the colours in the scheme.

Are you still awake? Well, hopefully I have solved this case and can't wait to move onto the next one:)  Thank you CSI for the awesome inspiration provided and for making it so much fun. :)

The gorgeous flourish on my layout is the FWAB Elise Flourish Silver - Dusty Pink & Rose Pink Flowers Set  from Flourish With A Bling.

FWAB Elise Flourish Silver - Dusky Pink & Rose Pink flowers

Oh and if you're wondering what happened to my poor Delta, she was spayed and at the same time I had to have her dew claw removed as it kept tearing into the flesh and causing an infection. She's such a lump and wasn't interested in anything except food when she got back from the hospital..drowsy and all...she lives to eat :) I cannot tell you how many socks I went through before the wound finally healed...she ate them :)

Now I need to go and do something about the mosquitoes that are biting the hell out of me under this desk. Till next time, be safe, take care and be happy!!xx


Thursday, November 29, 2012

Men of Men

Hello girls :) Had a very busy week creating all sorts of things and my scrappy place is full of uncompleted projects but at least this one is finished. I based my layout on a sketch which you can find here. I also tried my hand at Tracey Sabella's Misted Rock Salt Chipboard Tutorial and had a lovely time with it until the crackle starting popping off like little crackers and only then did I realize..OOPS..I forgot to complete the last step...LOL!!  Here are two little close-ups ....don't look toooo close!!

  Well, once I put the sealer on all was well and this is definitely something I will do again and again. Thank you Tracey...you're tutorial is great...can't say the same for the student though...lol! Till next time...take care and have a great day!x

Thursday, November 22, 2012

Beautiful

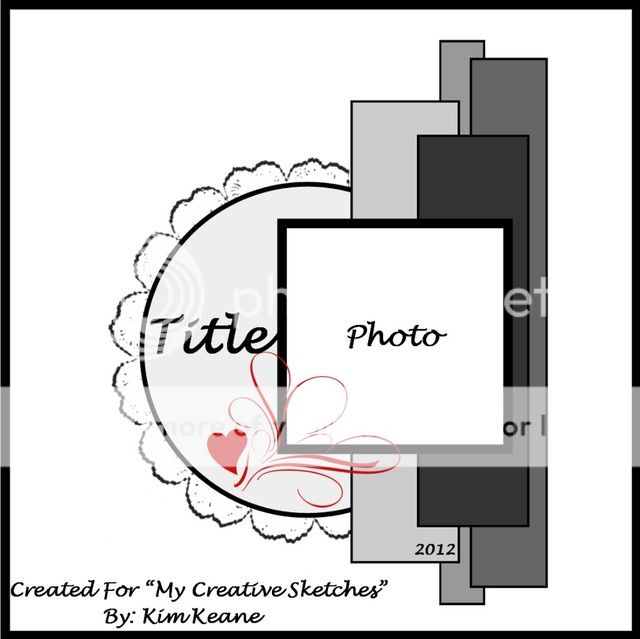
Another layout, another sketch contest...love them! I did this one for the sketch contest over at My Creative Sketches and loved working with Kim gorgeous sketch which you can see here. Once again, my gorgeous little niece Isabella is the focus of my layout. She's growing up so fast now and I am so sad that I am missing out on all the good things that is happening in her little life right now. I know that I will never give up hoping that they will come back to South Africa.

The little flourish pieces are from Flourish With A Bling and the name of this particular one is the FWAB Grace Pearl Flourish Pearl.  
The title letters were done using a foil-technique that was so cleverly taught by Melody Koopmans at our scrapbook marathon in October. Thank you Melody...loved it!

Till next time..thanks for looking and take care :) x

Sunday, November 18, 2012

Walking with the godfather

Hello again friends:) I so love the challenges over at Once Upon A Sketch and made a point of making some time to join them again this month. Nadia's sketches are so awesome to work with and this month is no exception.   Here I used a photo which I took when Isabella and I went to visit my husband and we spent a few days in Kruger National Park. Everything morning Isabella would grab her lion, ask Eddie to carry her pillow which is her little security blanket and her and Eddie would take a walk down to the Letaba river to watch the animals taking a leisurely stroll to the water for their first drink of the day. I would join them a little later with some tea and the three of us would just sit there and enjoy the peace and tranquility.  This month the theme is "anything goes" and you are free to create a layout based on whatever theme you like, but your layout must include some journaling and the sketch below. 

I love the fact that these challenges forces me to do some journaling because for the most part I am terribly lazy to journal and usually leave it till last and if there is no space on my page then it will be left out completely...not good :) The little flourishes are from Flourish With A Bling and I used the FWAB Chloe Pearl Flourish Black which I cut up and tucked between the flowers. 

Till next time, stay safe and take care and please know that I always appreciate your visits very much :) xx

Thursday, October 25, 2012

Treasure


Happy


Hello friends :) This week I played around with some Prima papers and because I couldn't decide which one of the two to use, I decided to use both and make them companion pages. As always, my darling little niece is the focus of my layouts. Tomorrow I am off to Cape Town for a Scrapbook Marathon and till next time, take care and be good :)

Wednesday, October 17, 2012

Goldilocks in Barcelona

I did this layout of little Hadiyyah and the picture was taken whilst they were on holiday in Barcelona..hence the title :) The flourish is from Flourish With A Bling and is called FWAB Chloe Pearl Flourish Antique Gold. This flourish is definitely my favorite:)

Materials used:

My Mind's Eye - Little Boy Blue "Curious"
My MInd's Eye - Portobello Road "You and Me" Love Birds
Graphic 45 - A Ladies' Diary Moment in Time
Graphic 45 - A Ladies' Diary Delicate Details
Grahic 45 - A Ladies' Diary  "A Ladies' Diary
Flourish With A Bling - Chloe Pearl Flourish Antique Gold
Distress Ink - Pine Needles and Frayed Burlap
Spellbinders Nestabilities Decorative Labels Eight

Thursday, October 4, 2012

Sweet

This is my take on the current challenge over at Once Upon A Sketch. The challenge is to incorporate something from this quote:
great life quote.
and also to use the sketch below:


Thanks very much for looking and take care till next time :)

Monday, September 24, 2012

Molly

Hello again friends :) I  got a bee in my bonnet and thought I would make a little hat for Miss Molly. I just love this picture :) Doesn't she just look like a little granny?? Anyways, it was such a struggle to get a decent photo because she kept shaking her head to get the hat off and only when I realized the ribbon was tickling her ears and subsequently adjusted it, she was quite happy to pose for the picture :) Special mention: The flourish is from Flourish With A Bling and I used the FWAB Grace Pearl Flourish Pearl.I also made this layout for a Guest Post at Ideas for Scrapbookers which is a treasure chest of ideas and inspiration for every scrapbooker. Thank you very much for the honour Pam :)


String art Tutorial:

So many of my friends have asked me how to do the string art in the top right corner of this layout and here it is finally:

To start with, decide where you would like to position the string art. Draw two light pencil lines as per the illustration directly on to your paper.
Make tiny little holes 1cm apart on each line
If you’re doing this for the first time, it helps to number the holes as per the illustration to eliminate confusion.
Thread your needle with the required colour thread (I usually use embroidery thread) and insert your needle into the  back of hole number 12 on the vertical line.
Bring the needle to the front and thread a few beads (3 or 4 will do fine) and then insert needle into hole number 1 on the horizontal line.
Then insert needle from the back into hole number 2 on the horizontal line, bring it to the front, thread another few beads and insert needle into hole number 11 on the vertical line.
Insert needle from the back into hole number 10 on the vertical line, thread beads and insert needle into hole number 3 on the horizontal line.
Insert needle from the back into hole number 4 on the horizontal line, thread beads and insert needle into hole number 9 on the vertical line.
And then you continue in the same pattern: No.8 vertical to number 5 horizontal, number 6 horizontal to 7 vertical,  6 vertical to 7 horizontal, 8 horizontal to 5 vertical, 4 vertical to 9 horizontal, 10 horizontal to 3 vertical, 2 vertical to 11 horizontal, 12 horizontal to 1 vertical. Fasten your thread with tape to the back of the work.
Don’t forget to thread a few beads as you go along.  Once you have completed the string work, you can then adjust the positioning of the beads as and how you would like them to be as they are loose on the thread and can be moved.

Have fun and enjoy!!


Sunday, September 2, 2012

Mojee


Hello again friends:) Today I am introducing you to my daughter's what was supposed to be a Labrador but since the puppy is now all grown up we still have no idea what he really is but that doesn't matter at all. So, please meet Ammo aka Mojee aka Muchee aka Mo aka Mojo and so on...lol!! So, if you have some time this month, hop over to Scrap Africa and join us in the new sketch challenge for September. Hope to see you there! Till next time, take care!